How to Draw Laser Graphic Content
Learn how to draw laser graphics mainly using the Advanced Frame Editor. As well as tracing tools, video tracing tools, and 3D animation tools.
To access the course after you purchase, click the account icon in the top right (if you're on desktop) or the three bars that is in the top left (on mobile).

Overview
In this course we will discuss how to create "Laser Content" Which is different from "cues" or "timelines" and is separate from Effects. Cues and things like that is when we take content and effects and put them together.
Primarily we will talk about drawing content instead of using generators so you can draw laser graphics, laser mapping lines, and things like that. Utilizing particular tools and an understanding of scanners to create graphics that are efficient, as well as beautiful instead of "cheesy".
We will talk about "post processing" and adding effects to drawing to improve the quality and animate base drawings after we draw "Raw lines"
After we learn to draw, we will then look at tracing tools, 3D importing tools and things like that to accelerate your creative process once you understand the technical and creative aspects of drawing from scratch. As these tools can be useful in particular scenarios but understanding when each should be used will be discussed.
Total watch time
2 Hours 6 Minutes
Requirements to have for the course:
- BEYOND Advanced
- 1 laser projector with well-tuned scanners
Language
Course is in English. Captions have been automatically generated, auto generated captions in other languages available upon request.
Suggested viewing
Plan to view this course on a desktop or larger screen, a phone screen will be too small to follow along.
To continue to the next section, you will need to completely watch the video and then scroll down to the "Complete and Continue" button. That button will only become available after the videos of each section are watched, then you will be able to continue.
If you have any questions or concerns during the course, please email support@pangolin.com with questions referencing the course, and particular lesson number and name.
Before you buy
Before starting the course, it is recommended but not required to be familiar with the following free training resources:
Full course syllabus
a. Overview
b. Content Length
c. Requirements
d. Pre-Requisites
a. Art styles to consider when creating laser graphics and interpretation.
b. Building a color palate and its faded hues.
c. Planning the lines that are important vs unimportant to represent the laser version of the design.
d. Using anchoring to define edges that need definition, and reducing points to make other things smoother.
e. Shading based on color as we draw to get each element built properly before moving on.
f. Black lines generally need inversion to white in laser.
g. How we translate fill, working with inking, and deciding colors that pattern similarly to the fill.
h. Drawing abstract lines and defining fills with simple lines.
i. Final Cleanup for optimization.
a. The types of tools in the advanced frame editor.
b. Laser cursor and right clicking.
c. Defining point spacing and anchoring for drawing lines, how to choose auto spacing values.
d. Reference/ Background pictures to trace from.
e. Testing point spacing to the lines you intend to draw.
f. Drawing patterns matter for effects later, and niceness to your eyes.
g. Cleaning up drawings after drawing them by adding and removing points.
h. Drawing different layers on different frames for later post processing.
i. Post processing your layers in a synth image to animate a static graphic.
a. Determine spacing for lines, and zero anchors at polygon corners.
a.1. For curves we want to place every single point ourselves, and our point spacing options determine that ability with the polygon tool.
b. Checking our point settings to effects we intend to add later to ensure we have the correct number of points.
c. Correcting those points and re-drawing for real.
d. Placing points for the density needed to draw what is necessary.
e. Cross Referencing the simulation to adjust your points for optimization.
f. Adding and removing points in different ways with different tools for the effects we want.
g. Post processing on your drawings.
a. Art styles to consider when creating laser graphics and interpretation.
b. Building a color palate and its faded hues.
c. Planning the lines that are important vs unimportant to represent the laser version of the design.
d. Using anchoring to define edges that need definition, and reducing points to make other things smoother.
e. Shading based on color as we draw to get each element built properly before moving on.
f. Black lines generally need inversion to white in laser.
g. How we translate fill, working with inking, and deciding colors that pattern similarly to the fill.
h. Drawing abstract lines and defining fills with simple lines.
i. Final Cleanup for optimization.
a. The Advanced Tracer tool inside the Advanced Frame Editor.
b. Tracing a video file using the Advanced Tracer.
c. Bulk Traces of video files frames.
d. After trace cleanup of animations using effects.
e. Recoloring of content after tracing can be done with any post processing method like we have done when drawing, and a unique one here is recolor by video.
f. Using Color separation and processing your video content in video editors before tracing to get better results.
g. Live video tracer is an extra tool that is available, and there may also be other tools in the future, but what will remain is the artistic need to decide what lines need to be drawn to accurately represent the original content.
a. The Plugins themselves.
b. Object point settings for the 3D objects in your scene.
c. How to use filter settings on your object.
d. Object line times to represent the verts and lines of objects and what lines will be rendered to laser.
e. The render is the plugins renderer.
f. Rendering Z Axis for post processing.
g. Rendering your scene to BEYOND, and how it places the scenes to the Grid.
h. Rendering layer by layer so that you can post process the scene in beyond instead of animation everything in your animation software.
i. Benefits of Blender (its free!) but also has the grease pencil which is tied to BeamBrush values.
j. Plugins for other software opens up laser content to the world's animation plugins for any of these software's expanding what you can create to make the content you are after.
a. Draw your company logo, or some sort of relatively easy logo with straight lines and sharp corners.
b. Create a "neon sign" with animation that includes text and graphic element, in a Synth Image with effects for animation.
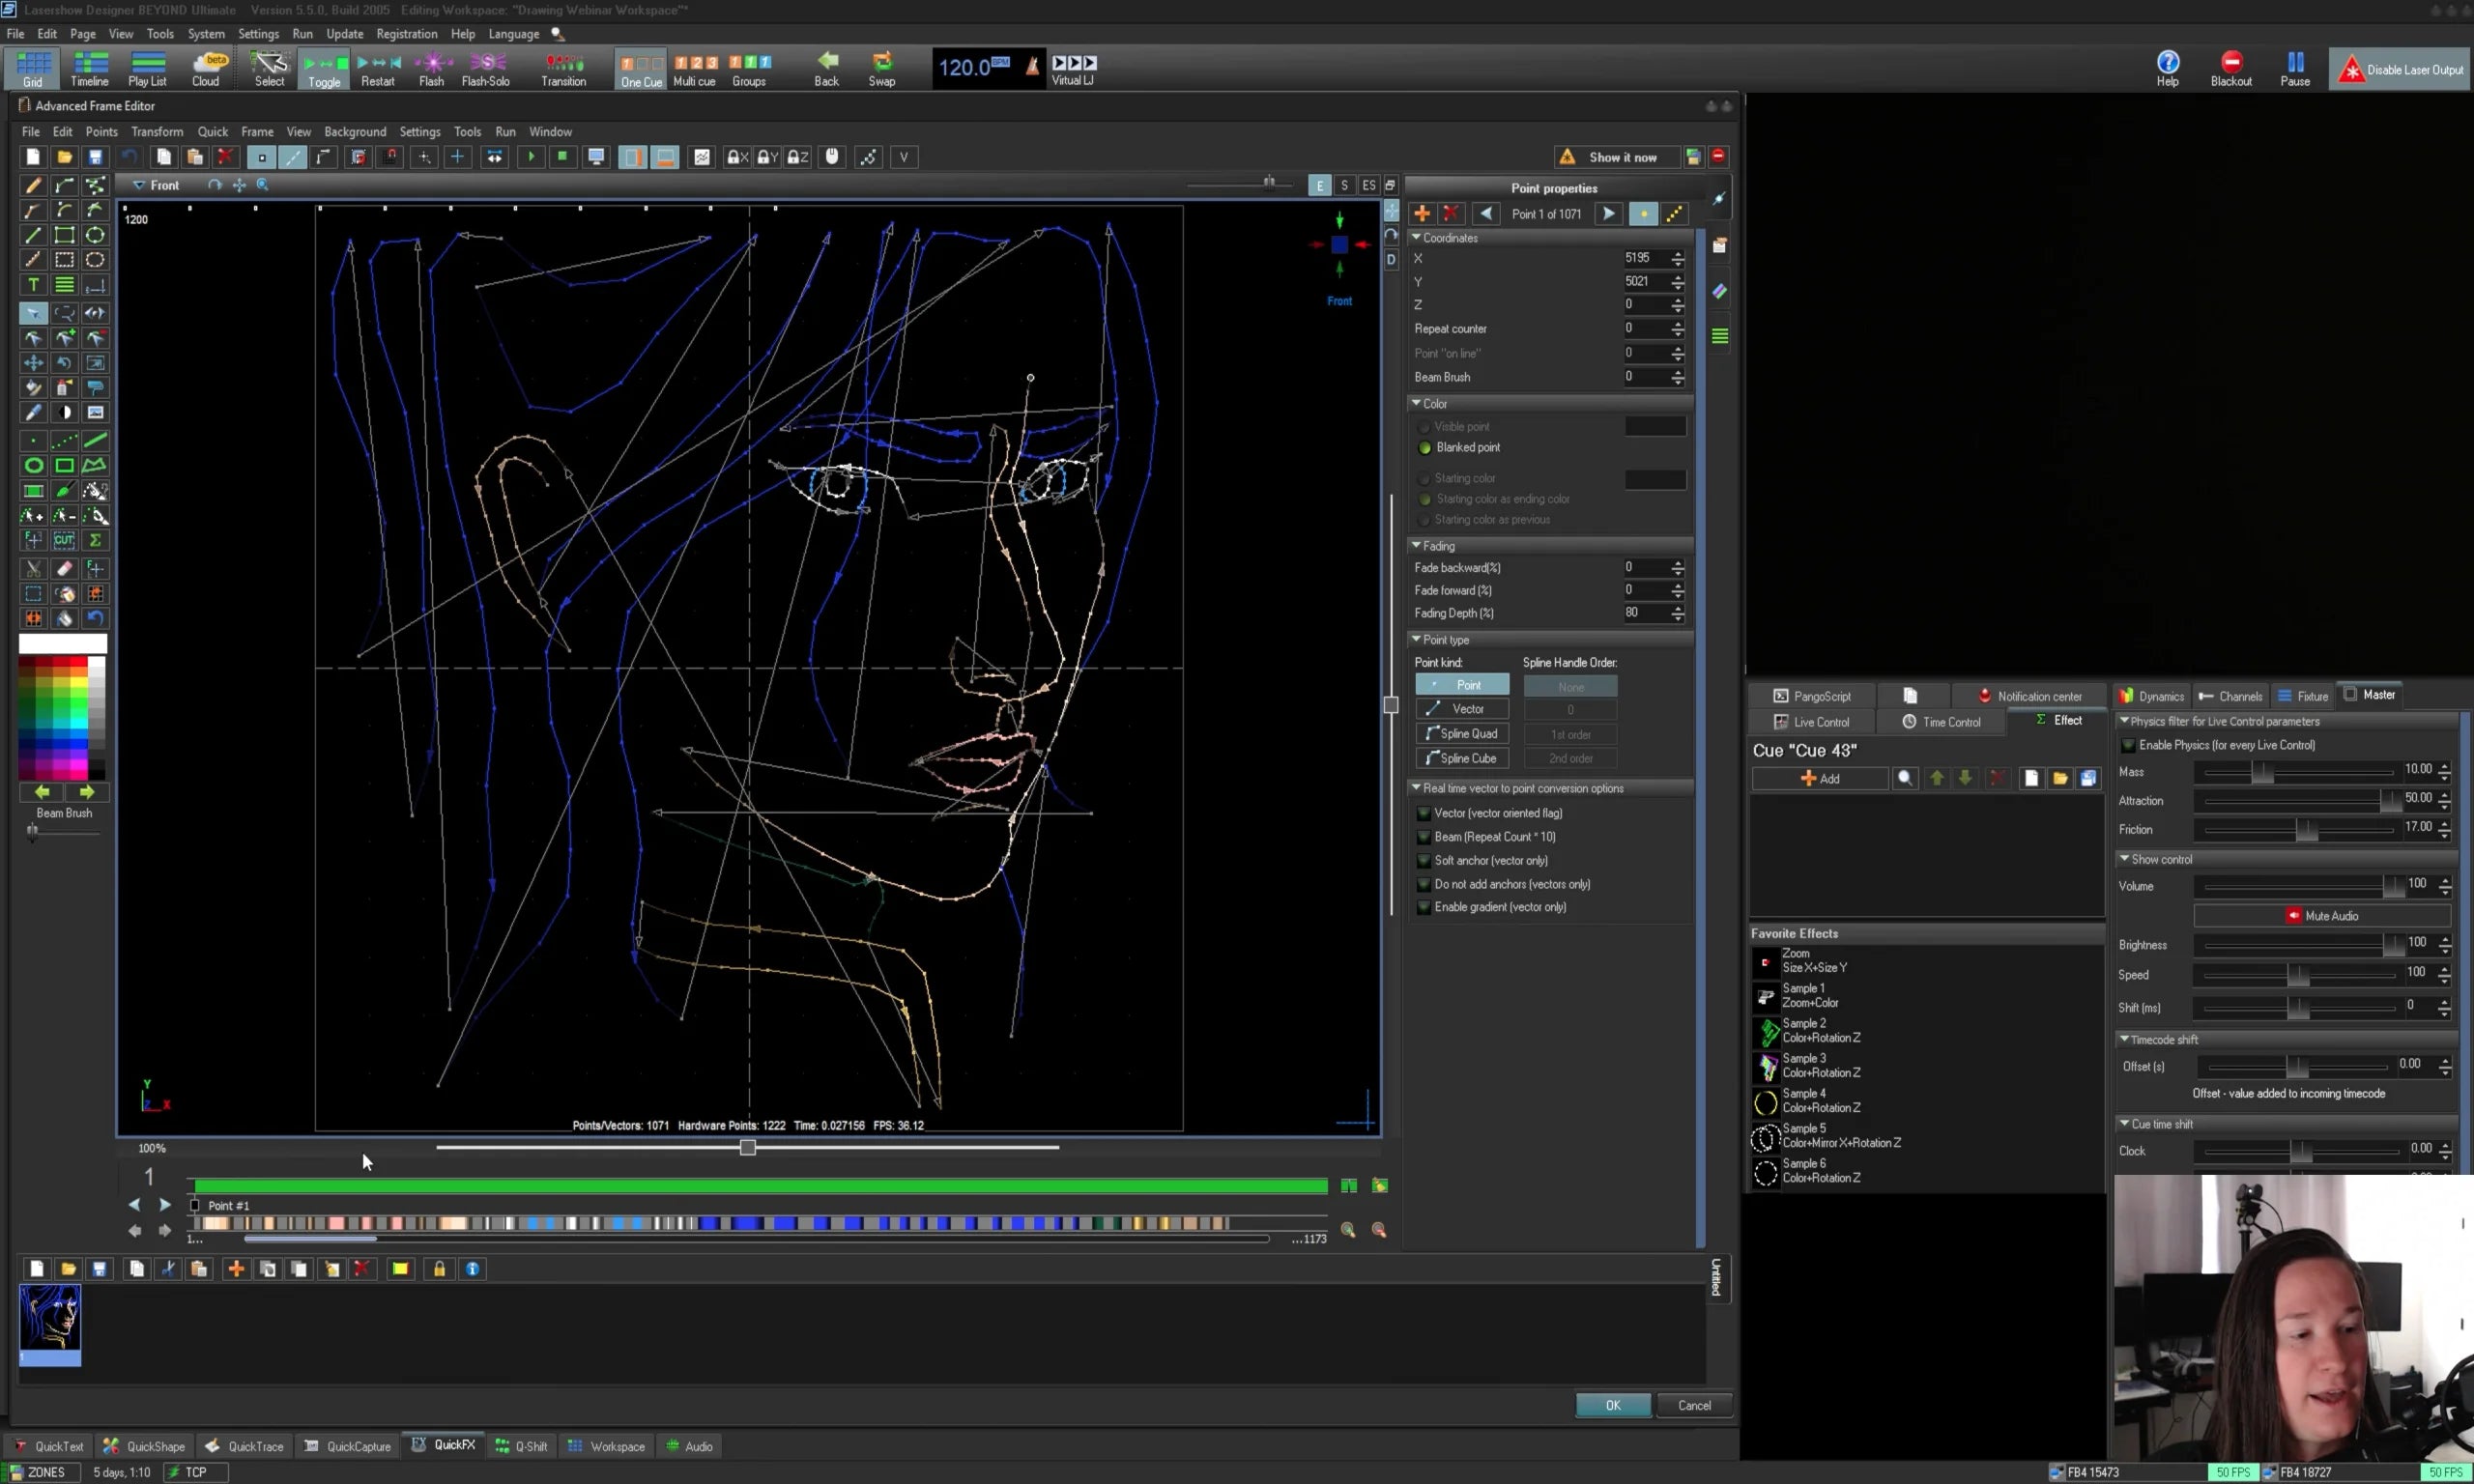
c. Draw a character, or a person to focus on artistic considerations of graphic drawing.
d. Find a visual you want to convert to laser, crush its colors in a video editing software, and use the advanced tracer to generate frames.
e. Pick a 3D animation program to learn I recommend just learning Blender as its free and has the most systematic support.
f. Learning fundamental animation considerations like taking an animation course or reading a book like "The Animator's Survival Kit" or "The Illusion of Life: Disney Animation" this in general will help you along your way with creating laser animations in general.